Have you decided that your product will benefit from the 360-degree branding of shrink sleeves?
Have you been using pressure-sensitive, cut & stack, or in-mold labels? Are you now interested in converting to shrink sleeve labels?
When you’re ready to commit to 360-degree branding, you’ll expect your graphics to be flawless.
The first principle to understand is that achieving successful shrink sleeve distortion is a challenging task. It requires many different components working in unison. The following information will help you get a general understanding of these different components and how they all work together.
If you have no prior experience with shrink sleeve distortion, it’s a confusing series of steps that can be tough to get a good grip on. If you’re trying to do it yourself, start with a mock-up of your designs. You’ll want to work with a graphic designer that has experience creating this specific type of mock-up for your product.
Once your design is complete and ready to go from digital to print, it’s time to decide on a printer. Involve your co-packer in the choice of which printer to hire. Not all printers are experts, however, when it comes to the distortion process – there’s no guarantee that you’ll be satisfied with your results.
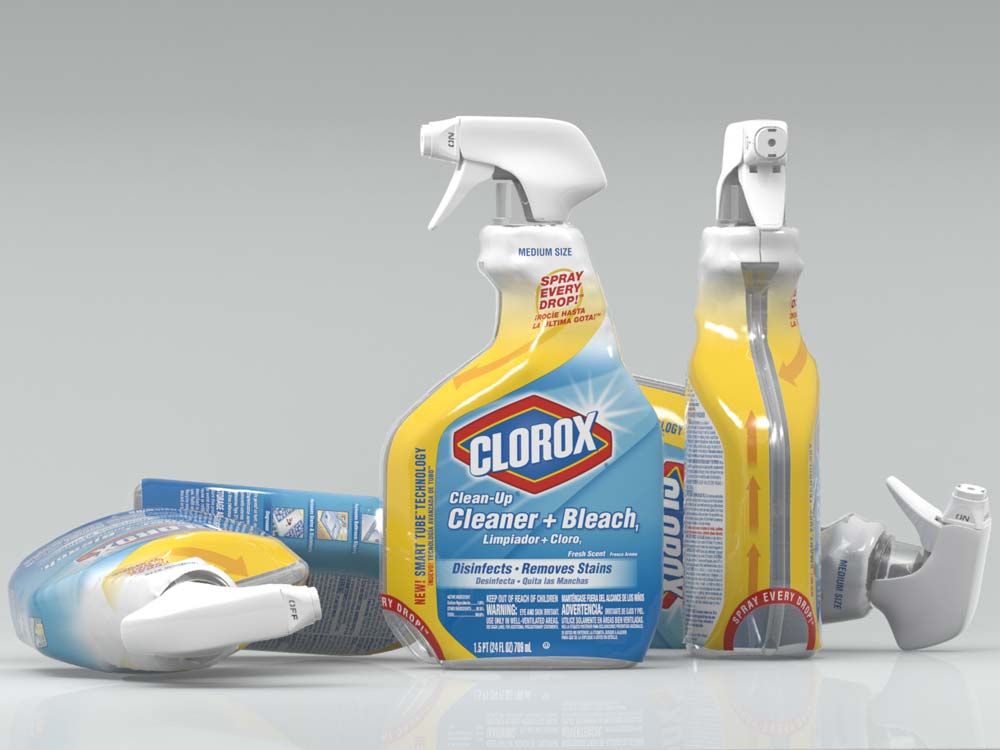
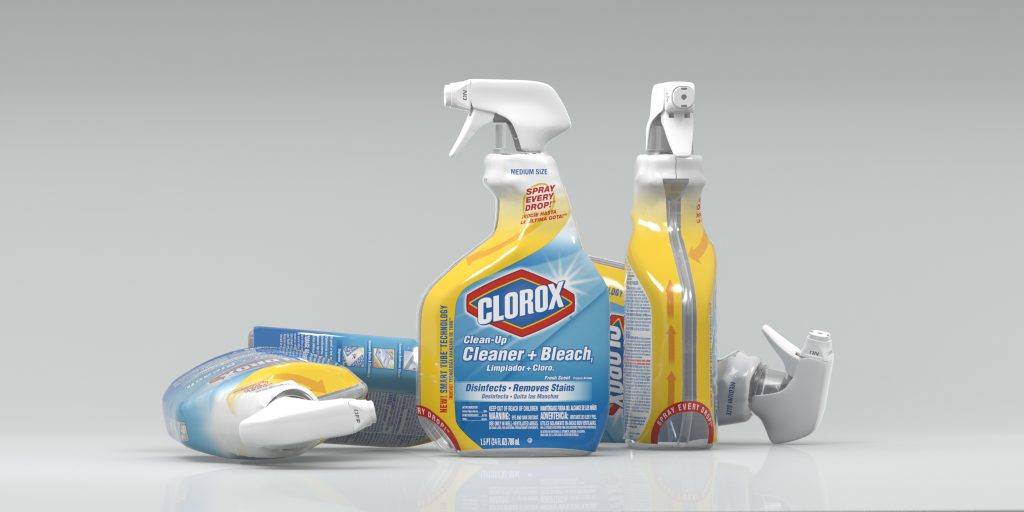
Partnering with businesses that know their way around all these steps will be extremely beneficial in terms of quality, efficiency, and cost. The following is an example of our team’s work when Clorox asked us to improve the distortion of their shrink sleeve trigger bottles.
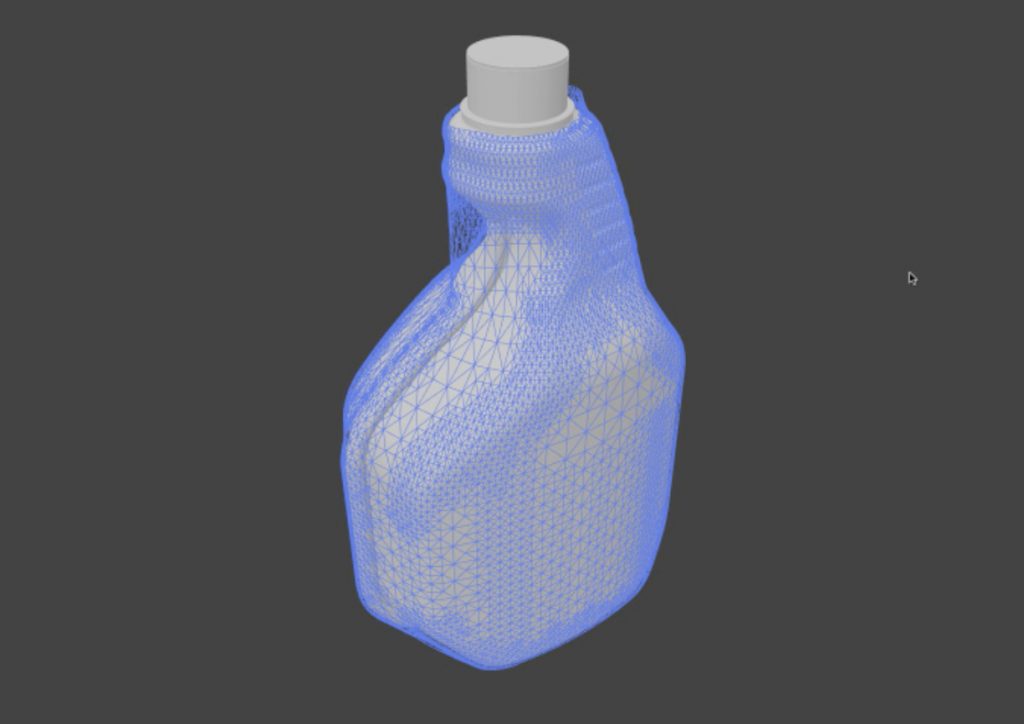
Phase 1
Shrink Simulation
We start with a 3D model of the product prototype. If you don’t already have the 3D CAD model of your product, this is something we can build from scratch for you. We then place the virtual shrink sleeve onto the bottle using a software simulator mimicking the shrink manufacturing process used on the assembly line.
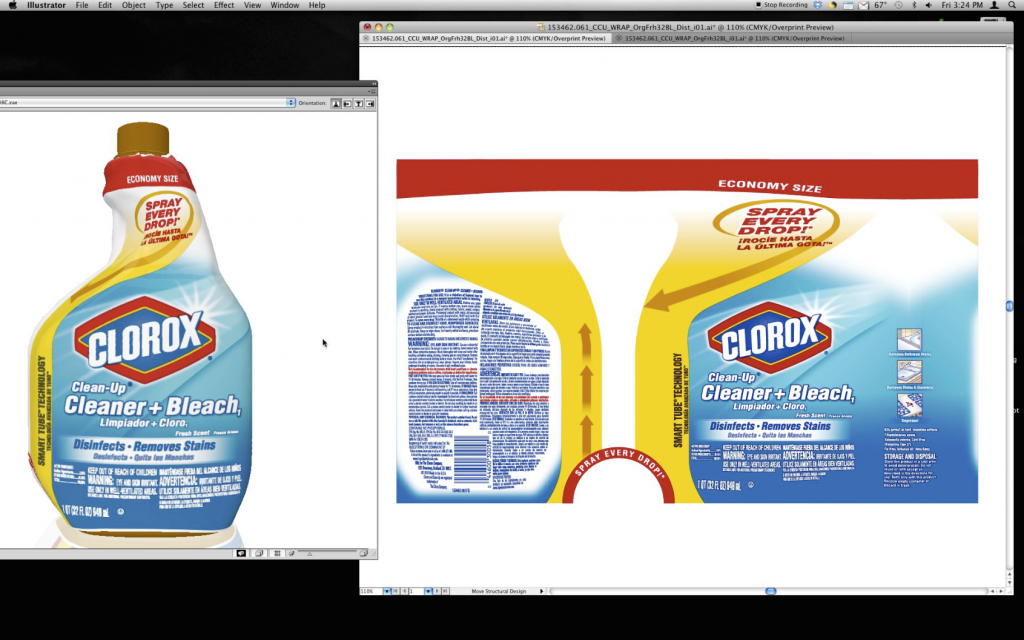
Phase 2
Adjust Distortion
The next step is to review the initial shrink and reposition the design elements of the distorted label interactively. During the simulation, we move the design elements around to find the optimal fit for the label. This step is very crucial as we are able to see in real time what the final product will look like as we are working on it.
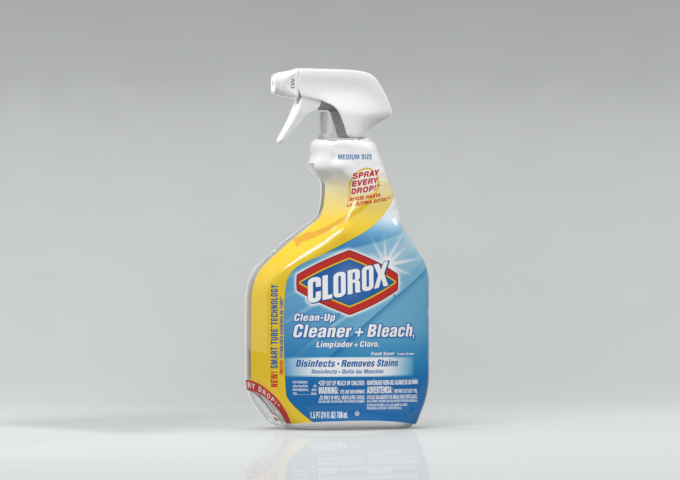
Phase 3
Render Distorted Art
Upon completion of the 3D distortion, we are able to provide the client with a render of this shrink sleeve and how it will appear on their product. In most cases, our clients are comfortable to move forward with production after seeing the final rendering of their product with the label. However, in some cases, we work directly with printers to run a print test in order to provide our client 100% confidence in their graphics.
Phase 4
Virtual Photography and Animation
Upon completion and approval of the final graphics, these assets can now be used in stand alone virtual photography or created in environments or animations on the web.
Hopefully, this has given you a better understanding of the shrink sleeve distortion process and how multifaceted it can be.
Finding an experienced company that can provide these services for you is not only the most time-efficient solution but also the most cost-efficient solution to creating your shrink sleeve label.
i4Color is unique because we can provide you with a digital 3D mock-up of your product prototype with your new design/label on it. Receiving immediate feedback on the final label and product will give you the peace of mind and confidence to proceed forward with all other steps of production. Partnering with us is easier, faster, and more reliable than attempting to tackle it on your own.
Sorry, the comment form is closed at this time.